My Whimcees

My Whimcees

Wednesday, September 30, 2009

A Fall Watercolor Card

Hello!

I have been gone so much lately that I have not had time to create. Today I have one of my watercolor cards to share. Hope you enjoy!


Thanks for stopping by today!

After today, I should be home now for a few interrupted days and have some new creations to share soon!

It has been very rainy and cold here in WI - can't believe that October starts tomorrow!

Batbata Diane

Tuesday, September 29, 2009

Same Card Layout, Same DP, Different CS

Hello!

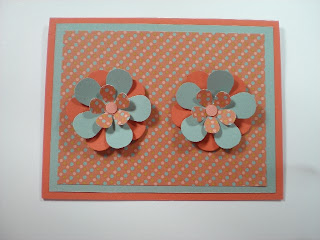
Today's cards are all made using the same layout and cut flowers and have the same DP but different color combinations of CS. The DP I used on all 3 cards is one of the SU Afternoon Tea series. The center circle of the flower on all 3 cards is SU Groovy Guava.

On the first card I used SU Soft Sage and Tangerine Tango CS with the Afternoon Tea DP.

On the second card, SU Sage Shadow and Groovy Guava CS with the Afternoon Tea DP.

And on the third card, Really Rust and Groovy Guava CS with the Afternoon Tea DP.

Then, to see the different color combinations together, I made an extra flower from each of the 3 card colors and a flowerpot to put them in.

Here are the 3 cards together.

And one with the flowerpot.

Thanks for stopping by today!

Wishing you a good day today!

Barbara Diane

Monday, September 28, 2009

Added Some Glitter "Bling"

Hello!

I don't know if you can see it very well on these photos, but I did add some glitter to the two cards from Saturday's post to give them a little extra "Bling" and so here they are. You may have to click on the photo to see a larger version.

I do like them with the glitter. :<)


Thanks for stopping by!

This week I am going to be trying different color combinations of the same card to see how it changes the card. See you tomorrow with the first cards using cutout flowers and the same DP!

Barbara Diane

Sunday, September 27, 2009

Three Simple Cards Using Cutouts

Hello!

Today's cards are made by using cutouts from DP.

I used the SU Pink Flamingo DP to cut out my flowers - matching the colors of CS on the first one, using another DP as a background on the second one and using complimentary colors of CS and marker, the SU Top Note Die and small pearls on the last one.

I hope you enjoy!


Thanks for stopping by!

After days of rain it is another gorgeous sunny Fall day here in WI and I hope you are having great weather this Sunday, wherever you are!

Barbara Diane

Saturday, September 26, 2009

Two Cards - Same Layout - Different Style

Hello!

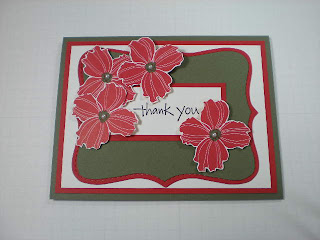
Using a flower stamp from the SU Fifth Avenue Floral stamp set, I made the two cards exactly alike in layout but in totally different color styles. It is always fun to see what a difference just that simple change will make in the end result! :<)

The first card is formal and elegant. I used SU Blush Blossom and Black CS, Black ink.


The second card is informal and colorful. I used SU Green Galore and Whisper White CS, Black ink, Ballet Blue and Night of Navy markers.


I think that I may add a bit of glitter to the cards to give them a little 'bling' and I will show you the results.

Thanks for stopping by today! Wishing you a great Saturday!

Barbara Diane

Friday, September 25, 2009

Third Pumpkin Box

Hello!

For the third box I wanted to do something a little bit different, so I made a belly band instead of using ribbon and I sponged the edges of the box.


This is a great little box to make and a nice size. I hope that you enjoyed my three versions. I used another of the SU Pawsitively Prints DP.

Thanks for stopping by today!

Barbara Diane

Thursday, September 24, 2009

Maybe It Was The Background Color?


Hello!

I feel I must stick up for this second box - it is very pretty! In fact, it was my friend Michelle's favorite of the three! Maybe it was the background color that was too dark? Or the first one had so much bling that it overshadowed the second one? :<)


Last box tomorrow!

Wishing you a good evening!

Barbara Diane

The Second Pumpkin Box


Hello!

I wanted to make the second pumpkin box for a man's gift, so I needed to find a DP and color of CS that would be a bit more masculine. I used an argyle print from the SU Pawsitively Prints and the Softly Suede CS.

This second box is made using the same tutorial and I have shown a few photos of how it went together.


Thanks for stopping by today!

It is a very 'Fall' day here in WI - wet, foggy, a bit humid, ground covered in fallen leaves. Guess the rain will continue on and off into the weekend. Hope the sun comes out later today!

Take care.

Barbara Diane

Wednesday, September 23, 2009

First Pumpkin Box


Hello!

Because I don't do scrapbooking, I never really know what to do with the DP that are a full one sheet design. So I thought for this first pumpkin box that I would use one of these and cut the pieces to make a continuing full design on the box - front, top, sides, etc.

For this first box I used one of the sheets of paper from the SU Pink Flamingo DP pack.

To make the box I used the Top Notes Box tutorial that Maria Bell has on her blog Stampin Inspirations (her September 19th post) and left off the Top Note Die. This is a great little box - thank you Maria!

You will love the creativity on Maria's blog! She is at http://stampininspirations.blogspot.com/


Thank you for stopping by today!

Wishing you a good one!

Barbara Diane

Tuesday, September 22, 2009

Boxes For Pumpkins


Hello,

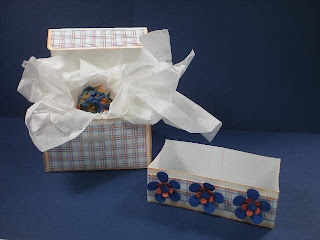
I needed pretty little boxes to send my millifiori pumpkins to friends. These are the 3 versions of the little pumpkins and I wanted to make a different box for each one.

Tomorrow I will post photos of the first box.


Little pumpkins awaiting new homes.


Thanks for stopping by!

The beautiful weather that we have been having in WI has ended for now - rain, rain and more rain. It is very dark and dreary today so best get to work with and surround myself with those lovely cardstock colors!

Barbara Diane


Monday, September 21, 2009

Pumpkins In A Pot


Hello!

Yesterday I posted a photo of my polymer clay Pumpkins in a Pot that I was using as a model for a flower pot card. Today, here the guys are again - in a card - to wish you a "Happy Fall Y'all" and a smiling start to a new week.


I started with a basic flower pot and insert cut from SU Dusty Durango Textured CS - using this card tutorial at Splitcoaststampers
http://www.splitcoaststampers.com/resources/tutorials/flowerpotpocket/ I added SU Pumpkin Pie ink around the edges of the pot with a sponge.


To make the pumpkin shapes, I used the SU 1 1/4", 1", 3/4" and the Wide Oval punches to cut them from SU Only Orange CS. Then I drew the lines on the pumpkins using a SU Pumpking Pie marker. The noses and eyes shapes were made from individual petals cut from various flower punches and a SU 1/4" punch. I added the SU Pumpkin Pie Ink around the edges of the pumpkins and the eyes/noses with a sponge.


The pumpkins were assembled using a glue pen to attach the eyes and a dimensional for the noses. The smiles were drawn with a SU Really Rust marker.


The 'grass' was made using a flower punch and cut from SU Soft Suade CS. I used glue dots to arrange them on the flower pot insert and also behind the pumpkin heads.


Then I put them all together on the insert and added a sign made from SU Whisper White and edged in SU Pumpking Pie ink and I wrote the message with a black marker. The sign post was cut from the Dusty Durango CS.


I added some ribbon to the flower pot to keep it closed so the insert could be put into the card. At this point another layer can be added to the insert where a message can be stamped or written. I forgot this part! :<)


And there you have it - a bunch of happy pumpkins in a flower pot!


Thanks for stopping by!

I hope that you enjoyed the tutorial!

Barbara Diane