
Hello!
Today Part II of the Secret Panel Card will show you how to make the finished card into a 5 1/2" x 8 1/2" card. To start, you will need two pieces of 5 1/2" x 4 1/4" colored CS that was used to make your base card. You will also need two additonal 1 7/8" x 5 1/2" white strips.
Put two strips of Sticky Strip along the sides of the end pieces of the card - this is where the two new sections will be attached to extend and create a larger size front and back of the card.

Attach the two sections.
Be ure to CHECK FIRST that you are ATTACHING THEM TO THE CORRECT SIDE of the card! Take a few trial runs before you glue the sections on! Look back at Part I from yesterday's post if you are confused, as those photos may help you.
You want the inside panels center fold to be at the front and the open ends of the two panels to meet together at the back. This creates the secret panel when it is then opened from the front.
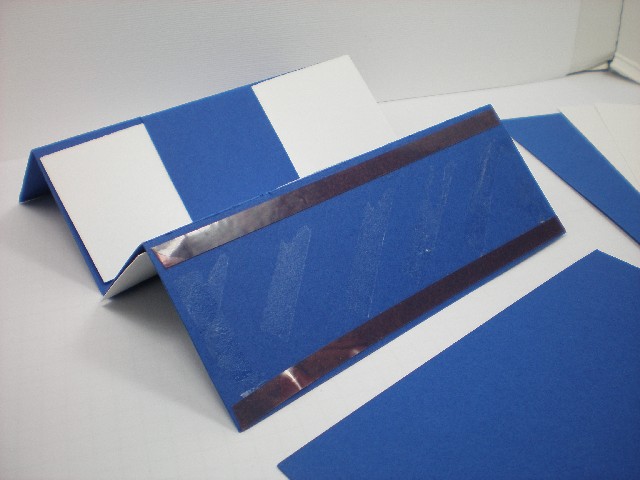 Like this. This is looking down at the card from the back. The front of the card is on the left of this photo and the back of the card is on the right.
 When the open ends of the two panels meet in back then the secret panels open out from the front. Like magic! :<)
 Here the card is lying on it's back. You can then cover the overlapping lines with the additional strips in either of the following two ways of placement - or in whatever creative way seems best to you! :<)
 This is now the front and back of your card. Not skinny any longer!
 I finished mine as a birthday card for my friend Sal, who's birthday is on Wednesday. My lovely blogger friend Helen sent me this beautiful white embossed Top Note as a protective layer on the top of the gorgeous thank you card she mailed to me. I thought it also so lovely, as I don't have this embossed plate, so I used it for the front panel of Sal's card.
I trimmed off the outer edge of the Top Note, outlined the embossed design with black ink, colored in with markers, added a little Stickles for a bit of bling (as I did on the inside the card) and then turned it upside down before adding the sentiment. I liked that better than to have the words at the top. :<)
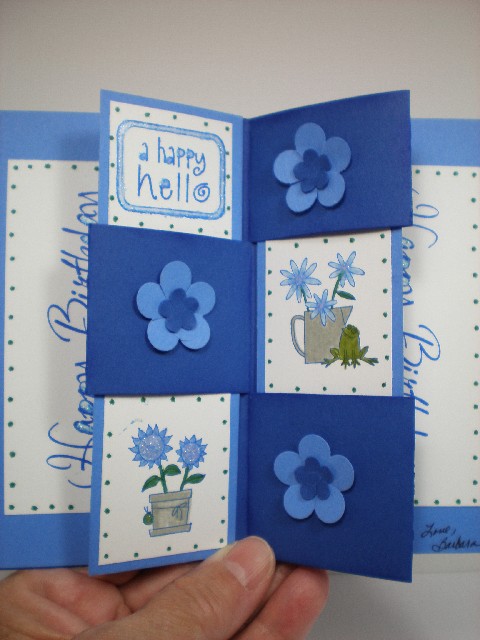
 The completed card inside - before folding the center panel together.
 The secret panels when open.

 The end. :<)
  All the while I was gluing on the front and back panels, I thought - there must be a way to make this all in one piece of CS - as I didn't like the ovlapping line on the inside where the larger piece of CS extended. So I worked out a pattern to do that and will have that as Part III - if you think you can stand more Secret Panel tutorials! :<) Maybe I will post some other projects in between for a change of pace.
Thanks for stopping by today!
Wishing you a great day! If you have any questions I will be happy to try to answer them.
Barbara Diane
3 comments:
This is great. I made one last year but it did not turn out as nice as this one. Love it! Hope things are going well for you. I am really going to try and get some mojo going this weekend.
Wow - Barb, you have mastered this card style. Love the card and images used. TFS and have a great day - take care. Hugs, P
This is way too cute Barbara. Thanks for the tutorial.
Bear Hugs,
Carol :o}
Post a Comment