My Whimcees

My Whimcees

Thursday, June 16, 2016

Needle Felted Jimbo

 Hello!

I remember when my Jimbo was just a little guy - he was only weeks when we got him - he is 2 1/2 years old now. He was only 4 pounds then - he is 15 pounds now. His size has changed, but some other things about him have not.

He always loved to lay on his back when sleeping - no concern then for how much space he took up because he was so small. He would just get comfortable, stretch out and go to sleep.


But now it is not as easy to get that comfortable.


The bed still works . . . . .


but some other areas not so much.


I recently ordered a needle felted miniature of Jimbo from Bay Colony Designs on Etsy - I sent different photos of him so the artist could see what he looked like. Judy Johnson is the artist and her work is perfection. She chose the photo above to model the miniature. Below are her photos of the finished tiny Jimbo.


Here he is in my hand. I am going to order another soon in a smaller size to fit in my miniature display room. I guess I didn't pay attention to the size listed and so although I love this one it is too large for the dollhouse size room I wanted to put it in. But I love it - isn't her work wonderful?


And here he is now - still taking it easy, no matter how difficult fitting in the space can be.


Wishing you a great day today! It is a bit cooler here today in this part of WI - high of 73 today - but summer is most definitely here.

Hugs,

Barbara Diane

Tuesday, June 14, 2016

Poster Card with Windows Challenge


Hello!

Lots of photos today as this poster card I made for my son Jim was quite the challenge. He asked me to make him a card that had windows that opened like the advent calendars he loves so much. No candy behind the doors but a different image in each one. I had not done this before but I was up for the challenge as I knew that I would use one of my new Graphic 45 collections and that it would involve mega fussy cutting! 

I used the Graphic 45 "Enchanted Forest" collection because it had dragons and knights in armor and was very colorful, so I hoped that would appeal to Jim. It took me over a week to make but when it was done I wanted to keep it for myself! I may make another down the road but for now I just keep finding new projects to create. 

I started with one of 12 x 12 papers that I chose to be my 'front' of this project. This would be the size of the finished poster card. I then chose and cut out the images from other papers in the collection that would be behind the windows in this main page - you can see them in the right upper corner of the photo.


I then had to decide where to place these images on the main page where I wanted the windows to be, drew around them with pencil and then cut out the windows. 


I then chose another paper from the collection to be the back of the poster card where the images would be glued.


Then after checking the positioning I glued the top sheet onto the backing with the images.


Then the next step was a bit more challenging as I had to cut and layer closures onto the page with the images - closures that the windows of the main page could fit under to hold the windows shut. After gluing them on I put scrap papers under the edges so that no glue would adhere to the images by accident so that only the closures would only be glued in the areas between the images.


Then when everything was dry it was time to close the windows and slip them under the closures to see if they would stay shut. They did and it was a happy day!


Now the real fun could begin - fussy cutting all of he many, many pieces to be layered onto the poster card! To begin I used another sheet of the collection of the same design and cut out the images from that to layer to the front.


I also fussy cut and added images from other papers in the collection. And then of course, when it was all completed I had to add the glitter!


I loved how it turned out! I will be making more of these window cards in the future!


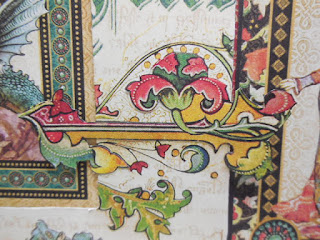
A close up of the closures.


I hope you enjoyed seeing this project! A lot of photos to go through I know, but it was a complicated poster card. I am happy to say that it was a hit with Jim!

Wishing you all a great day wherever you are and happy creating!

Hugs,

Barbara

Monday, June 13, 2016

Little Fairies 1, 2, 3, 4 & 5

Hello!

These wonderful "Little Fairies" are Mo Manning digital images and such fun to color and fussy cut! There are five of them and each one is as sweet as the other! To have them for your own to add them to your studio, go to http://www.mosdigitalpencil.com.

First color and cut around the image to make it easier to fussy cut.


Then fussy cut each one taking care to keep all the detail of the image.


Then I added glitter (of course) to the wings and some other details.


All cut and glitter added.


Made a background to attach the fairies to so I could hang them.


And here they all are - Little Fairies 1, 2, 3, 4 and 5.


On the wall.


Sunny and less humidity today here in this part of WI - more thunder storms in the forecast but right now it is very nice. High 87 degrees today but without that awful humidity it is nothing compared to the 90 degrees with it. Wishing you a happy day!

Hugs,

Barbara