Hello!
This past weekend my brother and sister-in-law came to visit and it was so great to see them as it had been almost a year since their last visit. Dick and Bonnie have always been most supportive of my artwork in all areas and generous with their kind comments. While they were here I was showing them various projects that I had made and Bonnie said that she was wanting to make the Post It holder and had purchased the supplies - but she did not have the pattern. I put together this tutorial for her.
I first saw the holders on a video on Angie Kennedy Juda's blog Chic'n Scratch. You can see the video and Angie's great creations at http://chicnscratch.typepad.com/ I loved the little holder and made some right away - many of which I posted photos of here on my blog. They are great for gifts and are easy to make. The CS can be embossed or stamped prior to assembly or a bit of ribbon and a strip of CS can be added as I have done here.
Bonnie always liked blue - so here is the tutorial for her. Have fun Bonnie! :<) Send me a photo!
 The measurements of the CS are Eight 1/2" by Three 3 3/8" - scored at Three 3/8", Four 1/8", Four 7/8" and Five 1/8" which will give you measurements across of 3/8" (back cover), 3/4" (spine), 3/4" (spine), 1/4" (raised edge) and 3/8" ( front cover).
 Fold the CS in half at the Four 1/8" score line. Use the bone folder to crease a sharp fold.
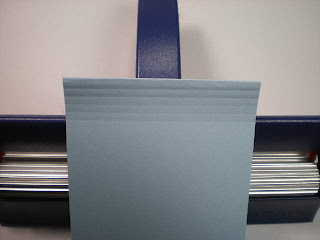
 Run the folded edge of the CS through a Crimper about 3-4 turns of the handle. This will crimp the folded 3/4" sections together. If this does not make sense, the photos below should help.


 Apply two strips of Sticky Strip to one of the 3/4" sections, remove the covering and glue them together . . . .


1 comment:
Thank you for the tutorial. I am a visual learner and your pictures are very helpful.
Post a Comment